There are a variety of aquatic plant types. The method used to add them to the aquarium depends on the type of structure. The three main categories are:
1. Plants having roots.
2. Epiphitic plants which have few roots or no roots at all.
3. Floating plants.
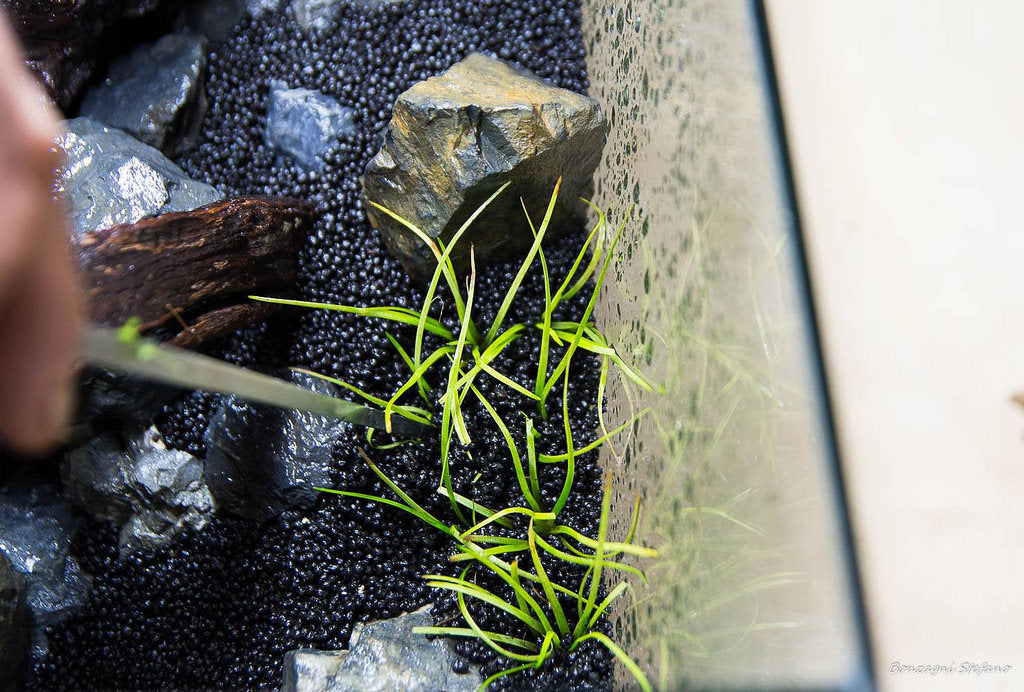
1) Plants Having Roots
2 ) Epiphitic Plants
- Common sewing thread or fishing line can be used to tie the Rhizome or Moss to the structure. This is a very basic approach. Simply wrap the line around the Rhizome/root/Moss strand. Do not wrap tightly as this will constrict the Rhizome/root/strand as it grows. Different plants have different abilities to adhere to the surface. Several weeks or months may be required for the plant to adhere. Some Mosses never adhere to the surface and it will require continual thread wraps to keep the plant on the surface. Cotton sewing thread at some point disintegrates under water. Nylon fishing line, of course will not decay. Whichever line is chosen may look unsightly for some time while the plant grows, but eventually the line should be covered with new growth.
- The Rhizome, root or Moss can be glued to structure using Super Glue. This product is sold under a variety of names, such as Crazy Glue. The active ingredient is “Cyanoacrylate”. So any glue with this ingredient can be considered to be Super Glue.
- A ladies hairnet wrapped around the structure can be used to contain a mass Moss or Riccia. Ensure that the gap of the netting is not too large so as to allow the pieces of the plant to escape, and ensure that the net is not wrapped too tightly around the stone or wood.
- It should also be noted that almost any plant, rooted or epiphytic, can be attached to structure using any of the above methods. Aquatic plants feed from their leaves, therefore, as long as the water column is fed nutrients it does not matter that the plant is not rooted. Consider that plants such as Rotala or other small leaved plants can look stunning attached to wood to give the appearance of the leaves and branches of a large tree.
3) Floating Plants
Plant Health Problems When Adding Plants to the Aquarium
Many hobbyists experience problems within days of adding new plants. They even complain to the supplier that they have been sold defective plants. The truth of the matter is to be found in the basic physiology of all plants. The fact is that all plants require the two most important ingredients for survival – Carbon Dioxide and Oxygen. Commercial aquatic plants are grown out of water in a nursery. Many people assume that if a plant is aquatic then it can be immediately plunged into water and should start growing immediately, but this is far from the truth.
In nature a typical scenario for aquatic plants is that they live two lifestyles, each lifestyle demanding a specific type of physiology. In some ways, this could be likened to that of a caterpillar-moth. In the dry season the water level is low. Most, or all of the plant is exposed to air and the plant lives very similar to a terrestrial plant. This is how they are grown in the nursery. They have rigid stems and thick, tough, waterproof leaves. They have access to atmospheric CO2, which is in abundance at over 300ppm. In the natural habitats, the rains start to fall during the start of the wet season and the flood levels rise gradually, giving the plant time to change their physiology to be better adapted to living under water. In our case, however, we typically flood the tank immediately and this often causes all but the hardiest of plants to suffer due to unavailability of Oxygen and CO2. Gases are less soluble and diffuse thousands of time more slowly in water than they do in air. The tough waterproof leaves and rigid structure that served the plant well during the dry season and in the nursery now becomes a serious liability. The cards are therefore stacked against the plant. To make matters worse, hobbyists often stress the plants even more by placing them under strong lighting which increases their metabolism and causes them to use up their energy reserves even faster.
The results range from algal blooms to outright melting/disintegration. Depending on the combination of conditions, this might occur over the span of a few weeks - or over as short a span as 24 hours under the worst cases.
When we observe plant health problems such as these analysis of the cause must include the strong possibility that there is poor gas exchange causing either hypoxia and/or CO2 starvation.
The following symptoms indicate severe problems with gas exchange:
Melting, disintegration, translucency of leaves, mushiness of stems or leaves.
If this occurs shortly after submerging the plant immediate action must be taken to prevent total loss of the plant. Remove the plant from the substrate and float the plant. A useful apparatus is a breeding net/trap within which the plant can be contained and not drawn into filter inlets, overflow weirs etc. If unable to prevent the plant from being thrown about or drawn into the filter inlet then remove the plant and float it in any vessel such as a bowl filled with water (any water will do, tap water, rain water, tank water etc.).
Allow the plant to recuperate for a few days or weeks depending on the severity of the damage. Floating the plant in this way allows it to breathe, i.e. gives it immediate access to atmospheric Oxygen and CO2. Gas exchange problems, specifically CO2 problems can occur from many different causes:
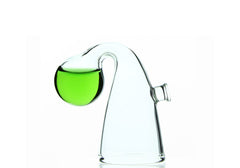
1. Ensure that the drop checker is a bright lime green color by the time the light come on.
2. Ensure that the light intensity is reduced by 50%.
3. Reduce the photoperiod to 5-6 hours maximum.
4. Ensure that flow rate is not compromised, that filter inlets are not blocked and that there is not too much media in the filters. Follow the 10X rule if possible wherein the filter throughput (turnover) rating is approximately ten times the volume of the tank.
5. Investigate the distribution methods being used. It is entirely possible to have strong flow, but to have that flow disrupted by large objects in the tank or by poor placement of the filter outlet spud. If the filter has an adjustable flow, ensure that it is set to maximum. If the maximum setting disturbs the fish then investigate ways of spreading out the flow energy evenly across the tank. If multiple filters and pumps are being used ensure that all pumps and filter outlets are parallel and are facing the same direction. Always AVOID placing filter and pump outlets in opposing directions.
6. Investigate the CO2 diffusion methods. Large tanks (200L or more) do best with inline CO2 reactors. If it is impractical to install an inline device, port the gas from the in-tank device just under the filter inlet so that the filter swallows the gas bubbles. This may cause burping or some noise. Experiment with injection rates to solve this.
7. Planted tanks do not require nearly as much filter media as fish-only tanks. That is because healthy plants will uptake ammonia/ammonium directly from the water column. Te filter media causes drag on the pump and reduces flow severely. Ceramic glass media are among the worst offenders. Coarse foam, alfagrog or any light, porous media will do and will enhance flow rate to the tank.
The following symptoms indicate significant but not immediately life threatening problems with gas exchange:
Excessive loss of leaves, brown spots, black spots or other discoloration, deformation of leaves, translucency of leaves, hair or any filamentous algae, Black Brush Algae (BBA), elongation of stems i.e. leggy growth.
The same steps(items 1-7) as listed above should be followed. Additionally, if the tank has a high plant mass, it may be that the high mass causes blocked flow. Thinning and pruning can help to alleviate this issue.
BBA can be addressed using liquid carbon products containing gluteraldehyde. Dose per bottle suggestions as long as there are no plants that respond negatively to liquid carbon. Plants such as Riccia, Utricularia liverworts, bladderworts have a low tolerance so overdosing should be avoided. Monitor behavior and health of fauna. Damage to the BBA can be verify by it's turning pink/purple, which it can then be removed. Note however, that BBA will return if the conditions have not been improved. Liquid carbon can also be used against green filamentous algae, however, in this case it works by increasing the CO2 availability allowing the plants to become healthier.
If CO2 gas cannot be increased further due to low fish tolerance, liquid carbon can be used daily as a supplement. It should be added just prior to lights on as it degrades over time.